
Sub-Panel Installation for Bitcoin Mining at Home
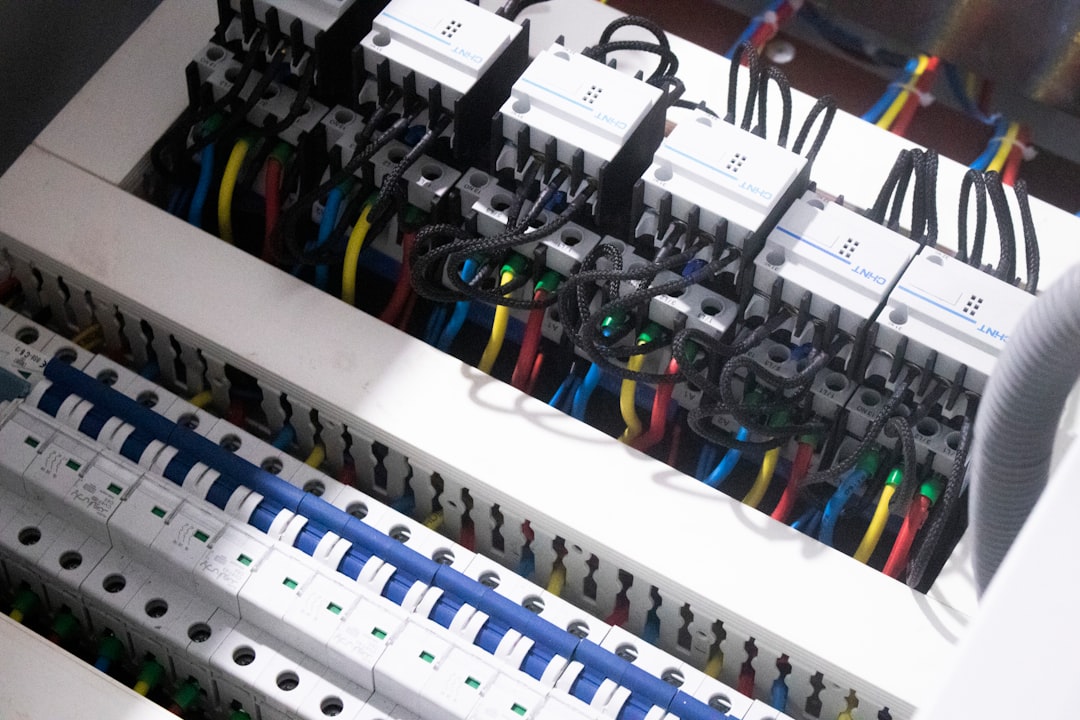
Once a home mining setup grows past one or two ASICs, the main panel runs out of slots and the load calculation starts pressing the service rating. Dropping a dedicated sub-panel — sized for the mining load and fed from the main with a properly rated feeder — separates the miner circuits from the rest of the house and gives the operator clean headroom for expansion. This article walks through sub-panel installation bitcoin mining basics: feeder sizing, neutral and ground separation, the permit conversation, and where a homeowner stops and a licensed electrician takes over.
Why a dedicated sub-panel beats sharing house circuits
Sharing a 240 V dryer or range circuit with a miner is a bad idea for several reasons. The shared circuit’s breaker is sized for the original appliance, not for a continuous mining load. The cable run was not specced for 24/7 operation. The receptacle blade pattern usually does not match the miner’s PSU cordset. And homeowner’s insurance treats unpermitted modifications to existing circuits very differently from a properly permitted sub-panel addition.
A sub-panel solves all four problems. It carries its own feeder from the main, sized for the total expected mining load. It supplies dedicated branch circuits for each ASIC, each sized per the 240 V circuit sizing math. It frees up space in the main panel for non-mining loads. And — critically — it gives a clean point of disconnect for maintenance, troubleshooting, or insurance shutoff during a fire emergency.
Load calculation: how big should the sub-panel be?
Sub-panels are sized at the feeder level by adding up the continuous loads they will serve and applying the 80 percent rule. For four S21-class miners at 3,500 W each, the total continuous load is 14,000 W ÷ 240 V = 58.3 A. The minimum feeder rating is 58.3 ÷ 0.80 = 73 A, which rounds to a 100 A sub-panel feeder. That same 100 A sub-panel can host six branch circuits with reasonable headroom and leaves room for an extra circuit or two for accessory loads (lighting, a small exhaust fan, a network switch).
Operators planning more than six units on one sub-panel should jump to a 200 A sub-panel with a 175 A or 200 A feeder. The jump is not just about ampacity — it is about wire size. A 100 A copper feeder runs on #3 AWG or aluminum #1; a 200 A feeder needs #2/0 copper or #4/0 aluminum, plus a larger conduit and a larger main breaker in the source panel. The $100,000 mining farm starter plan walks through these sizing decisions at the small-farm scale.
Feeder sizing in practice
The feeder is the cable run between the main panel and the sub-panel. It has to carry the full sub-panel ampacity continuously, so its conductors are sized from NEC Table 310.16 the same way branch circuits are. A 100 A copper feeder uses #3 AWG THHN/THWN; a 100 A aluminum feeder uses #1 AWG. Length matters too: long runs above 75 feet typically need a one-size upsize for voltage drop, and the feeder neutral can sometimes be sized smaller than the hots if the load is mostly 240 V (which mining loads are).
The feeder also carries a separate equipment grounding conductor — a green or bare copper wire bonded to the sub-panel’s grounding bus. This is one of the most common code violations on DIY sub-panels, and it matters more than most homeowners realize. Mixing neutral and ground at a sub-panel creates parallel current paths that can energize metal enclosures and trip GFCI devices unpredictably. The correct configuration carries four wires between the main and sub-panel: two hot legs, a neutral, and a separate ground.
Neutral and ground separation at the sub-panel
This is the single most important code point for sub-panels, and it is worth a section of its own. At the main service panel, the neutral bar and the ground bar are bonded together (the neutral-to-ground bond happens at the service disconnect). At every downstream sub-panel, that bond must be broken: the neutral bar floats on insulated standoffs, and the ground bar bonds to the enclosure.
Most modern sub-panel boxes ship with a “main bonding jumper” — a green screw or strap — that the installer either installs (if the box is being used as a main panel) or leaves out (if it is being used as a sub-panel). Leaving the jumper in on a sub-panel is the most common DIY mistake. Getting it wrong creates a code violation that an inspector will reject on sight, and more importantly creates the parallel-current hazard mentioned above. A licensed electrician verifies this configuration as part of the permit sign-off.
Permits, inspections, and who actually needs one
Adding a sub-panel to a residential service is a permitted job in virtually every U.S. jurisdiction, most of Canada, and across the EU and UK under their respective wiring regulations. The permit typically requires a one-line diagram of the existing service and the new sub-panel, a load calculation showing the existing service can carry the added load, and a final inspection after the work is complete. Permit fees are modest — usually $50 to $300 — and the inspection is the same visit.
Operators who skip the permit run two risks. The first is insurance: most homeowner’s policies exclude damage from unpermitted electrical work, and a fire caused by an undersized feeder is exactly the scenario the exclusion covers. The second is property value: an unpermitted sub-panel surfaces during a home inspection at sale time and forces either remediation under deadline pressure or a price concession to the buyer. Permitting the work upfront is almost always cheaper than dealing with it later.
Service capacity: does the main panel have room?
Before adding a sub-panel, the existing service capacity has to be checked. A typical 200 A residential service has 200 A nameplate but only 160 A continuous capacity after the 80 percent rule. After subtracting existing loads — HVAC, water heater, range, dryer, EV charger — there may be only 40–80 A of spare continuous capacity left. Adding a 100 A sub-panel that will run 73 A continuously consumes most of that headroom, and adding a 200 A sub-panel to a 200 A service is usually not feasible without a service upgrade.
A service upgrade is a much bigger project: it involves the utility, the meter base, the service entrance cable, the main panel, and a fresh permit. Costs in North America typically range from $2,000 to $6,000 depending on whether the service drop is overhead or underground and whether the meter base needs replacing. For farms planning serious growth, the three-phase power overview covers the alternative path of upgrading to a commercial three-phase service instead.
Sub-panel location and physical considerations
Sub-panels need accessible working space in front (typically 30 inches wide and 36 inches deep under NEC 110.26), a vertical clearance from floor to top breaker, and a dry, ventilated location. A garage wall is typical; a damp basement corner usually is not. Mining loads also add a thermal consideration — the sub-panel itself stays cool because the breakers are sized properly, but the room hosting the miners gets hot, and a sub-panel in that same room sees elevated ambient temperatures that can derate breaker capacity.
Operators planning a mining room should put the sub-panel in an adjacent space — a utility closet, an attached garage that vents outdoors, or an outdoor enclosure rated for the climate. The branch circuits then run from the sub-panel into the mining room. Detailed airflow planning lives in the ducting and airflow design guide; thermal-budget context is in the hot aisle vs cold aisle write-up.
Cost and timeline expectations
A typical residential 100 A sub-panel install in North America runs $1,500 to $3,500 including permit, materials, electrician labor, and the inspection. A 200 A sub-panel runs $2,500 to $5,500. Service upgrades to support a larger sub-panel add $2,000 to $6,000 on top. Timeline from quote to energized circuit is usually two to four weeks, dominated by permit processing and electrician schedule rather than the actual install (which is typically one day’s work for the panel itself plus a half day for branch circuits).
Operators sizing the hardware that will live behind the new sub-panel can browse the Coin Web Mining shop for current-generation ASICs with published wall-power figures, which feed directly into the load calculation that the electrician needs to size the feeder.
A final practical note: when sizing a sub-panel, plan for the next two units, not just the current one. Mining capex is lumpy — an operator who installs a 60 A sub-panel for one ASIC almost always wishes within twelve months they had specified a 100 A panel. The incremental cost of larger feeder and panel at install time is a small fraction of the cost to redo the work later, and the local inspector will not object to capacity headroom that meets code.
References
- U.S. Energy Information Administration electricity data — EIA.gov
- Bitmain ASIC product specifications — Bitmain.com
- Canaan Avalon ASIC specifications — Canaan.io
- ASIC power and efficiency reference — ASICMinerValue.com
How big a sub-panel do I need for four miners?
Do I need to separate neutral and ground at a sub-panel?
Do I need a permit for a residential sub-panel?
Once the sub-panel is energized, the Coin Web Mining catalog carries the ASICs that fit the branch circuits behind it. Bulk buyers planning farm-scale deployments can start a quote for orders of five units or more.